
Introduction
Here we will be looking at the installation of LAMP i.e. Apache, MySQL, PHP on Ubuntu 20.04 on a Local / Remote VPS in this blog. We can follow the same instructions on all the platforms i.e. Amazon AWS, Digital Ocean, Vultr, Linode or for the matter locally or any VPS having Ubuntu 20.04.
LAMP is the basis of most of your server acting as a web server to host your Website or Web application.
If you would like to self host WordPress Website (or any app that requires LAMP) on your server, you can follow the instructions and get it set up and running within a short span of time.
Requirements
This installation blog is meant to be done on Ubuntu 20.04, other versions will require a slight bit of modifications, which will have a complete blog of its own. Please do checkout my other blogs for more information.
- We require Ubuntu 20.04 with a minimum of 512 MB of RAM for running the application effortlessly.
- In this blog, we will be using Amazon AWS with the free tier t2.micro instance for our installation.
- The process would be the same across other VPS providers such as Digital Ocean, Vultr, Linode or on a Local machine
If you are looking to get your new VPS server you can click on the below options. (The links have affiliate links which help both of us monetarily).
Starting the Installation.
1 – Updating & Upgrading Packages
sudo apt updatesudo apt upgrade2 – Apache Web Server Installation
The Below command will install Apache Web Server,apache2-utils is also installed to have useful utilities such as Apache HTTP server benchmarking tool.
sudo apt install -y apache2 apache2-utilsOnce the above commands are finished, Apache server should be up and running, you can check the status of the server with the below command.
sudo systemctl status apache2Sample Output, if everything is properly setup.
If the command doesn’t quit automatically, Just Press “Q” to terminate and get back to the terminal window.
● apache2.service - The Apache HTTP Server
     Loaded: loaded (/lib/systemd/system/apache2.service; enabled; vendor preset: enabled)
     Active: active (running) since Sat 2021-04-03 08:00:14 UTC; 24h ago
       Docs: https://httpd.apache.org/docs/2.4/
   Main PID: 42399 (apache2)
      Tasks: 55 (limit: 1160)
     Memory: 15.7M
     CGroup: /system.slice/apache2.service
             ├─42399 /usr/sbin/apache2 -k start
             ├─43606 /usr/sbin/apache2 -k start
             └─43607 /usr/sbin/apache2 -k start

Apr 03 08:00:14 ip-172-31-17-158 systemd[1]: Starting The Apache HTTP Server...
Apr 03 08:00:14 ip-172-31-17-158 systemd[1]: Started The Apache HTTP Server.
ubuntu@ip-172-31-17-158:~$
If there is any issue and Apache didn’t start as intended, you can try to start it by using the below command.
sudo systemctl start apache2Also, enable Apache to start automatically once the system reboots
sudo systemctl enable apache2Check on the installed version of Apache.
apache2 -vOutput, if everything is properly set up, up and running.
Server version: Apache/2.4.41 (Ubuntu)
Server built:   2020-08-12T19:46:17
3 – First Test of Apache Web server.
If all the above has successfully completed, you should be able to see the Apache2 Ubuntu Default Page.
Just fire up a browser, type in the IP address of your server, you should be able to see the below default page.
Click here on how to get the IPAddress on AWS and Digital Ocean, Vultr and Linode.
In case you are installing it locally on a Ubuntu 20.04 desktop, you can use http://127.0.0.1 or http://localhost and you should be able to see the Default page.
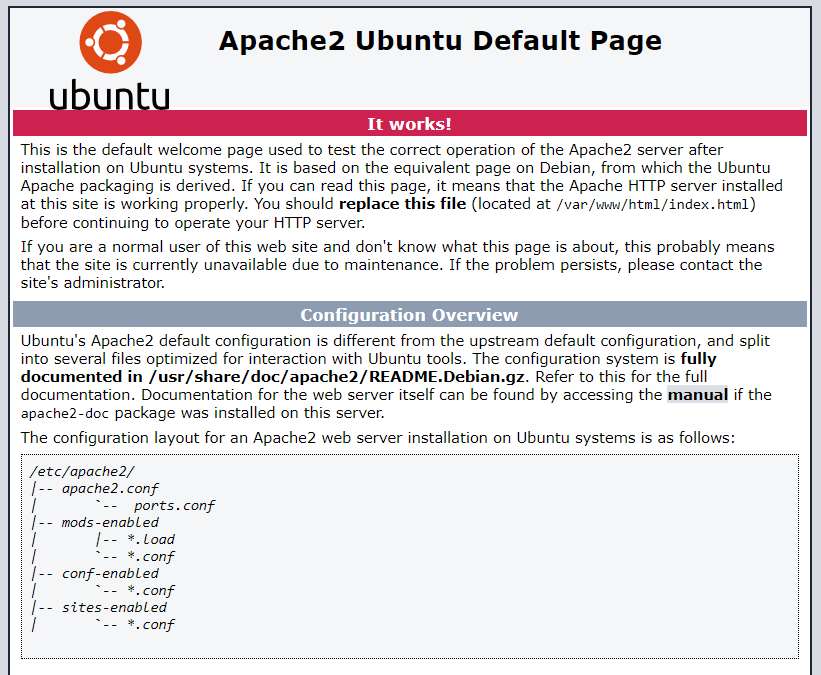
Congratulations on the first success.
If you have a message, connection is refused or Failed to complete, it would be the firewall causing the issue which prevents incoming requests to TCP Port 80. If you are Amazon AWS, your security group should look like the below image. Edit and add the HTTP TCP Ports 80 and HTTPS TCP Ports 443 on your instance security group.
For Other platforms you need to make changes on the IP Tables firewall and UFW Firewall.

For iptables firewall, the following commands will open your TCP port 80 on your firewall.
sudo iptables -I INPUT -p tcp --dport 80 -j ACCEPTFor UFW Firewall, the following commands will open your TCP port 80 on your firewall.
sudo ufw allow httpFollow Step 3 and check on the process again, now by this time you should be able to see your Apache2 Ubuntu Default Page.
4 – Set Apache user as the owner of documents.
By default, the documents are owned by the root user. We need to set www-data (Apache user) as the owner of the document root (also known as web root). Run the below command to set the user.
sudo chown www-data:www-data /var/www/html/ -RTo check if the hostname is resolved in DNS, check with the below command.
sudo apache2ctl -tIf there is really an issue, you would get the below message, and can be solved easily by adding a ServerName in Apache.
AH00558: apache2: Could not reliably determine the server's fully qualified domain name, using 127.0.0.1. Set the 'ServerName' directive globally to suppress this messageFollow the below process to add the ServerName in Apache.
sudo nano /etc/apache2/conf-available/servername.confAdd the following line in this file. Save and exit the nano editor after that.
ServerName localhostEnable the config file.
sudo a2enconf servername.confReload Apache server for all the setting to be applied.
sudo systemctl reload apache2Again check the below command to check if the ServerName gets resolved. If you have followed the process above correctly the error should not appear.
sudo apache2ctl -t5 – MYSQL / MariaDB Database Server Installation.
MariaDB is a fully opensource replica of MYSQL, we will be using it for our Invoice Ninja installation.
sudo apt install mariadb-server mariadb-clientCheck the status of MariaDB installation.
systemctl status mariadbOutput if everything is working perfectly.
● mariadb.service - MariaDB 10.3.25 database server
     Loaded: loaded (/lib/systemd/system/mariadb.service; enabled; vendor preset: enabled)
     Active: active (running) since Sat 2021-04-03 07:40:58 UTC; 1 day 2h ago
       Docs: man:mysqld(8)
             https://mariadb.com/kb/en/library/systemd/
   Main PID: 17481 (mysqld)
     Status: "Taking your SQL requests now..."
      Tasks: 30 (limit: 1160)
     Memory: 89.8M
     CGroup: /system.slice/mariadb.service
             └─17481 /usr/sbin/mysqld

Apr 03 07:40:59 ip-172-31-17-158 /etc/mysql/debian-start[17519]: mysql
Apr 03 07:40:59 ip-172-31-17-158 /etc/mysql/debian-start[17519]: performance_schema
Apr 03 07:40:59 ip-172-31-17-158 /etc/mysql/debian-start[17519]: Phase 6/7: Checking and upgrading tables
Apr 03 07:40:59 ip-172-31-17-158 /etc/mysql/debian-start[17519]: Processing databases
Apr 03 07:40:59 ip-172-31-17-158 /etc/mysql/debian-start[17519]: information_schema
Apr 03 07:40:59 ip-172-31-17-158 /etc/mysql/debian-start[17519]: performance_schema
Apr 03 07:40:59 ip-172-31-17-158 /etc/mysql/debian-start[17519]: Phase 7/7: Running 'FLUSH PRIVILEGES'
Apr 03 07:40:59 ip-172-31-17-158 /etc/mysql/debian-start[17519]: OK
Apr 03 07:40:59 ip-172-31-17-158 /etc/mysql/debian-start[17583]: Checking for insecure root accounts.
Apr 03 07:40:59 ip-172-31-17-158 /etc/mysql/debian-start[17587]: Triggering myisam-recover for all MyISAM tables and aria-recover for all Aria tables
If the server is not running automatically, you can use the below code to try to start the MariaDB Services
sudo systemctl start mariadbAlso, enable the services once the server restarts.
sudo systemctl enable mariadbNow we have to follow the below steps to finalize the MariaDB server installation.
sudo mysql_secure_installationAs this is a fresh installation there is no password set, So just hit enter to continue.
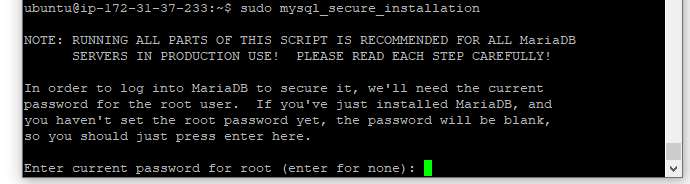
Now set your Root Password. “Y” in caps means its the default option if you hit enter. Enter your root password and make a note of it somewhere. Confirm the same password once again.

Now MYSQL will ask for several questions and its all better to agree them for security reasons. “Y” in caps means its the default option if you hit enter. Enter “Y” or just hit Enter at all the options.
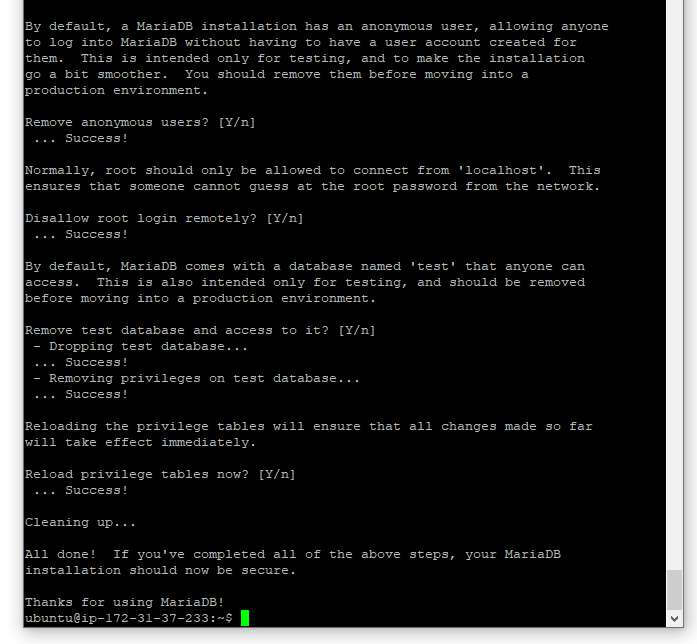
MariaDB package on Ubuntu uses unix_socket to authenticate user login, which basically means you can use the username and password of the OS to log into the MariaDB console.
Run the following command to login without providing a MariaDB root password.
sudo mariadb -u root
exit;
Check the version of MariaDB installed on your server
mariadb --versionOutput if everything is fine.
mariadb Ver 15.1 Distrib 10.3.25-MariaDB, for debian-linux-gnu (x86_64) using readline 5.26 – Onto the final Part of LAMP Stack – PHP 7.4 Installation.
PHP 7.4 is the latest stable version of PHP and we will be using that for the installation of our Invoice Ninja Application. Run the below code to install PHP and all of its dependencies in a go.
sudo apt install php7.4 libapache2-mod-php7.4 php7.4-mysql php-common php7.4-cli php7.4-common php7.4-json php7.4-opcache php7.4-readlineEnable the Apache PHP module and restart the Apache Web server.
sudo a2enmod php7.4

sudo systemctl restart apache2
Check the version of the PHP installation
php --versionOutput if everything is running fine.
PHP 7.4.3 (cli) (built: Oct  6 2020 15:47:56) ( NTS )
Copyright (c) The PHP Group
Zend Engine v3.4.0, Copyright (c) Zend Technologies
    with Zend OPcache v7.4.3, Copyright (c), by Zend Technologies
Now onto some testing of the PHP framework. We will create a phpinfo.php file on document root and test.
sudo nano /var/www/html/phpinfo.phpThis will open up a nano editor, just enter the code below and exit the editor.
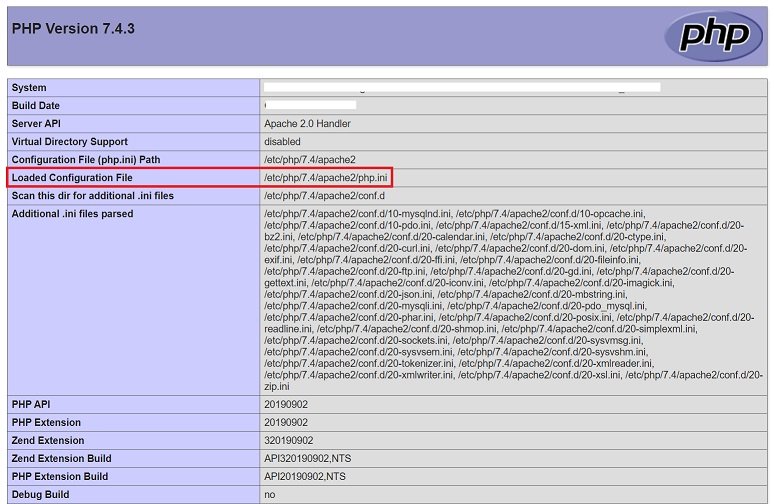
<?php phpinfo(); ?>Just fire up a browser, type in the address on your URL bar http://ip-address/phpinfo.php, Replace IP-address with your servers IP Address and you should be able to see the below PHP Info page. Click here on how to get the IP-Address on AWS and Digital Ocean.
In case you are installing it locally on a Ubuntu 20.04 desktop, you can use http://127.0.0.1/phpinfo.php or http://localhost/phpinfo.php and you should be able to see the your servers PHP information.
If you are able to see the below image your installation of PHP Is properly done.
7 – Run on PHP-FPM with Apache.
Sometimes there would be a requirement of applications to run of PHP_FPM, we will install it for our application.
First of all, we will disable Apache PHP7.4 module and install the PHP-FPM module
sudo a2dismod php7.4sudo apt install php7.4-fpmEnable proxy_fcgi and setenvif module.
sudo a2enmod proxy_fcgi setenvifEnable the /etc/apache2/conf-available/php7.4-fpm.conf configuration file.
sudo a2enconf php7.4-fpmFinalize the installation by restarting our server once. Once the server is up again.
Just fire up a browser, type in the address on your URL bar http://ip-address/phpinfo.php, Replace IP-address with your servers IP Address and you should be able to see the below PHP Info page. Click here on how to get the IP-Address on AWS and Digital Ocean.
In case you are installing it locally on a Ubuntu 20.04 desktop, you can use http://127.0.0.1/phpinfo.php or http://localhost/phpinfo.php and you should be able to see your servers PHP information.
If you are able to see the below image your installation of PHP Is properly done.
sudo systemctl restart apache2
For security reasons, we will delete the phpinfo.php file from the server.
sudo rm /var/www/html/phpinfo.phpCongratulations!! we have successfully installed LAMP on UBuntu 20.04 and start using the server for your various requirements.
Check out how to Install Invoice Ninja using LAMP on Ubuntu 20.04 here.
Hope this blog tutorial will help to set up LAMP onto your server. If you liked the content please do subscribe to our Newsletter and follow us on our social media platforms.
That’s all folks!